
A big thanks to Maryann at Domestically Speaking, for the heads up on the free paint
last Sat at ACE! Not That I need anymore paint! Seriously, I counted. I have over fifty...yes 50,
containers of paint in all different colors! But, I didnt have this color!! Since it was FREE, and I already have a bazillion colors on hand, I got COBALT! My fave color. I dont have
anything to paint this shade....yet! Ima lookin. Isnt it yummy??

MAPLE HUTCH
The finished product is at the bottom of this post......Dont peek now...scroll on down!!
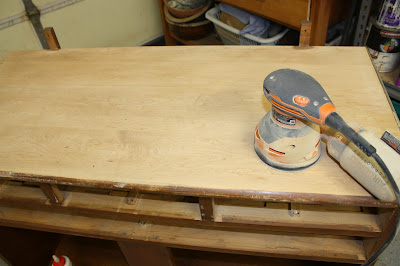
Here is my latest project. A pretty nice score from CL. I dont think the owners ever once polished, cleaned or even wiped this baby down! She was pretty grimy!!Im going to go over some wood finishing steps while Im working on this project. I have been refinishing wood a lot longer than Ive been painting it.
I couldnt believe what a beautiful top the lower part of this hutch had. I know, youre looking at it and going, "yeah, right." Just wait. This hutch is solid maple. I couldnt believe my eyes when I sanded off that stain. Pure, solid maple butcher block. Even those shelves are solid. I sanded those puppies down as well.
I will be adding bits to this day by day until Im finished.


 Filling in a crack w/some wood filler.
 This left leg had a some serious gouges and a chunk missing from the molding. No problem.
 Heres what it looks like after sanding and staining.
 And heres what it looks like after painting! I dont think anyone would have known.


 In case you forgot the before.....


0 comments:
Post a Comment