skip to main |
skip to sidebar
Behold the throw-away table my sister picked up off the street! At first I said, "nah, what the heck am I going to make with this clunky thing??" But she brought it over anyway.
I'm really into the beachy subway art theme so I thought why not try it on this table?
It's not going to cost anything but my time.
Here ya go! Kinda glad I gave it a shot!
Here is the Art piece I had done first.
Read more »
I found this piece of, er, um,,,,,piece at a garage sale around the corner.
It was a sad, sad little water damaged buffet. But the nice thing
about wood is that it's hardy and forgiving!
Take a gander at this solid maple beaut...
Yes,,,that thing lying in there is the bottom shelf. The top looked just as bad as the rest of it.
They were asking $30...I offered 20 bucks. The two girls nearly threw it at me.
Should have offered 5. Oh well.
I had a bit of left over milk paint in turquoise. I brush a bit here and there on top and then painted the whole thing with CeCe Caldwells White.
Read more »
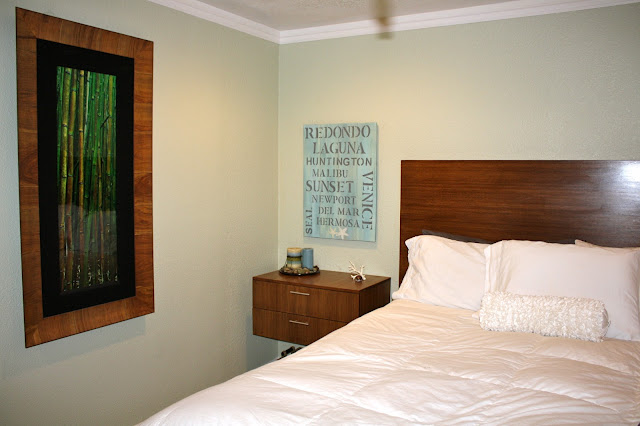
I just finished my second subway art project. Its been sittin for awhile.
All of the beach names where stenciled and painted by hand.
Yessiree Bob it is quite the time suck.


I just used some pieces of Douglas Fir wood, attach them together from the back, sand,
stain (walnut) and gave em quick coat of ASCP Pure White.
I did the stenciling in 2 different fonts using the 2" and 3".
After penciling all the names, I went back in with an artist brush and used
graphite color chalk paint to fill in the names. After it was dry, I used a sanding block
to distress the words and gave it coat of clear and dark waxes.
Easy but time consuming.
So it was a pretty good day for sales last week. Since I dont have a store, I list my items for sale
on Craigslist. Ive actually done quite well. It might take a few weeks, but most everything sells.
I got a call from a lady who wanted my "Crack-house" dresser #2 and the little nautical table.
When she came over to pick them up, she mentioned she needed another dresser for her sons room.
I had this sitting in the garage awaiting my attention:

Heres what it looked like when I got it. (Sorry, I took these photos after the stripper had been applied)
The gloppy drip was there before I started. Some people should be forbidden to apply stain to wood.
I hate stripping furniture worse than root canals. Seriously.
This fun activity took about, oh, 4-5 hours. The mirror took most of that time. Horrendous.
I used my soy gel stripper. I raved about it on my "Frenchy Dresser" post. If you strip, then you
must get some of this. Its totally non-toxic (I dont even wear gloves) and cleans up easily with water.
And it works like nobodys business!! Trust me, you will never use anything else again.
This piece was pretty darn messed up. The finish was hideous, the original handles and keyhole plates were MIA, the drawers barely slid open and the bottoms were almost rotted away.
What sold me on the piece was the mirror. It was some gorgeous wood-work. And the beveled glass was beautiful. I knew I could work my magic on this piece.
And apparently, so did Tori. She saw it sitting there and asked if I could make it look "Beachy".
She wanted it blue with some white and yellow and distressed.
Cool. I hadnt done anything like that before so I told her Im in!

But first, a little help from Hubs,,,,,and Judy. How cute is this dog?? Mean Pit Bull??? Dont believe
it. She loves everyone. This is the best dog I have ever owned.
After he fixed all the necessary structural issues, I got busy.
I didnt have time to stage this gal in a vignette,,,so the garage photos will have to suffice.
Please dont shake your head at my crap filled garage,,,,it is my work shop!
 |
She wanted white worked into the wood. I used ASCP Pure White on top, the mirror accents and on the body.
|
Forgive the quality. The light wasnt great and the garage floor gives off a blue tint in the photos.
The blue is my homemade chalk paint. I used MS "Mariner".
These top two drawers were not in the best of shape, so I lined them with fabric. All the sides of the drawers got painted. I think it just finishes the piece. Sometime you have to pay extra attention to the details.
In the interim of working on this dresser, I started on some subway art.
Yeah, yeah,,,Im only a year too late. WELL, i didnt get the memo!
And it appears as if Im the only one without a cricut or some other machine to make the lettering.
Hey! Im old, and I do it old school!

I had some fence lumber sitting around, so Hub cut it and attached them from behind. After a quick sanding, I mixed up 4 different colors and painted them on my "canvas".
Got my 2" and 3" letter stencils, and printed out the names of local Southern Calif beaches.
I just eyeballed everything. I traced out the stencil in pencil and them went back over them
by hand, painting each letter, using my homemade gray chalk paint.
Hey, Im in fron the camera for a change!
And heres what I ended up with:

I love how this came out! I was so surprised!
It did take many hours between penciling the words and then
going back and painting them.
Im aware of the vinyl reverse stencil method, but I didnt have the materials.
And I didnt want to wait. When I get an idea in my head, I just do it.
So, I had this sitting in the garage when Tori came by this afternoon to pick up her dresser.
She and her friend commented on how cute it was. My husband blurted out, "Its for sale!" LOL
She asked how much, I told her, and she said, "Ill take that too!" She ended up with four of my items!
It was a very good day!
I will definitely be making more of these puppies!
Scored this little beat up gem off of CL. It looks good from afar, but trust me,
she showed her age up close.
I decided on a very shabby, anthro style.
Here's what I did:


Read more »


 Read more »


